Your food processor for mixers (5KSM2FPA) is assembled in the box, ready to help you slice, dice, shred and julienne your fresh ingredients. Firstly, attach it to your mixer following the instructions below, and then see how to switch between the various discs to achieve different results.
Here are the steps to attach the food processor to the mixer:
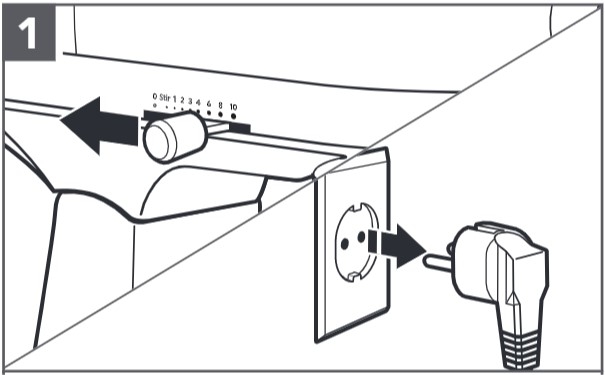
- Turn the mixer off (speed '0') and unplug.
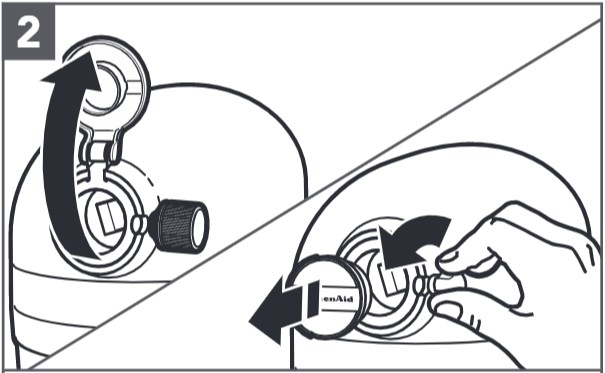
- For mixers with a hinged attachment hub cover: flip up to open. For mixers with a removable attachment hub cover: turn the knob counterclockwise to remove the cover.
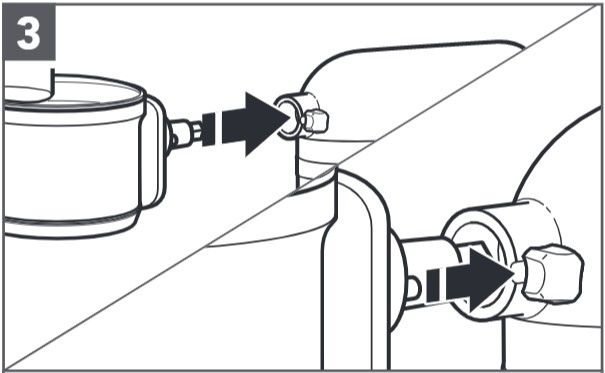
- Insert the attachment into the attachment hub. Rotate the attachment back and forth if necessary. The pin on the attachment housing will fit into the notch of the hub rim when in its proper position.
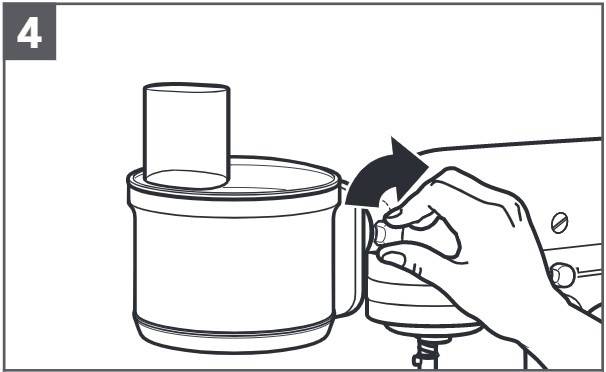
- Tighten the attachment knob until the food processor attachment is completely secured to the mixer.
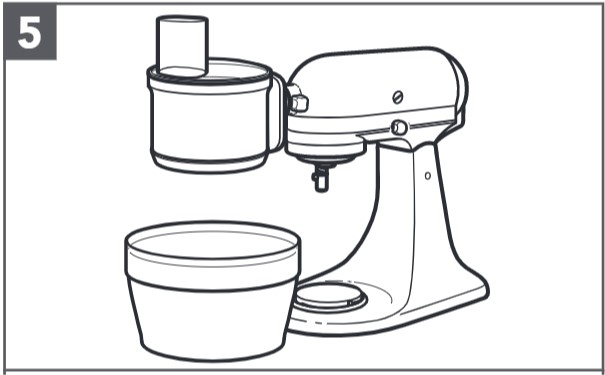
- Place a bowl or container under the food exit chute ... and you're all ready to go.
How to remove the food processor lid:
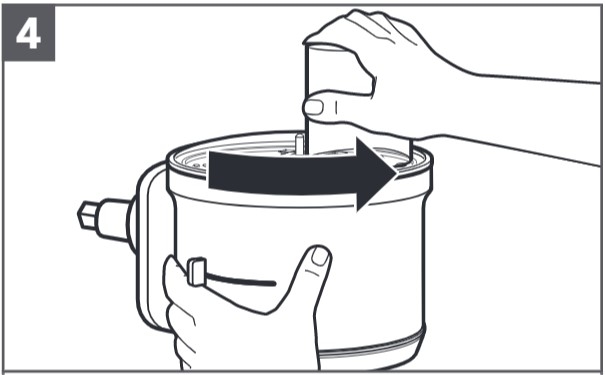
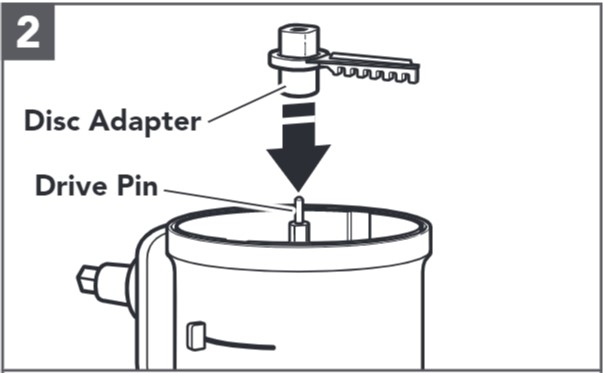
- Grasp the feed tube on the interlock lid and turn it clockwise to remove it from the food processor attachment assembly.
How to install the reversible shredding disc:
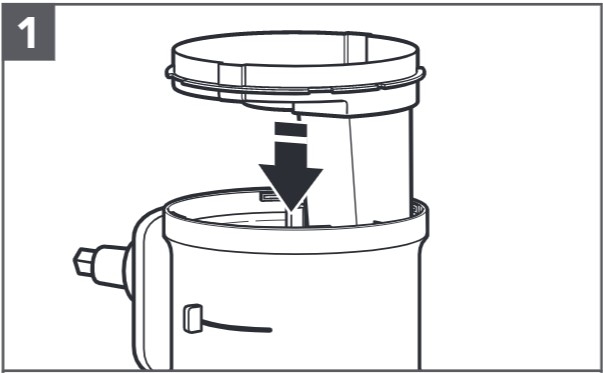
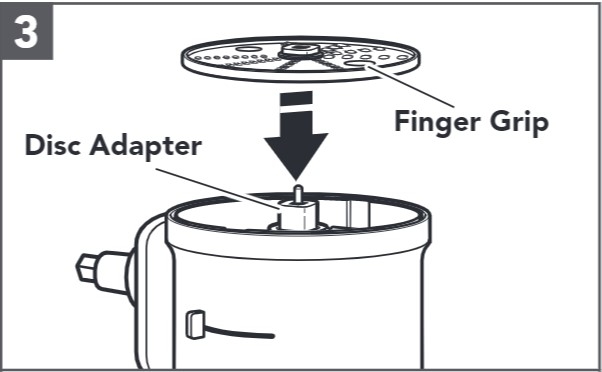
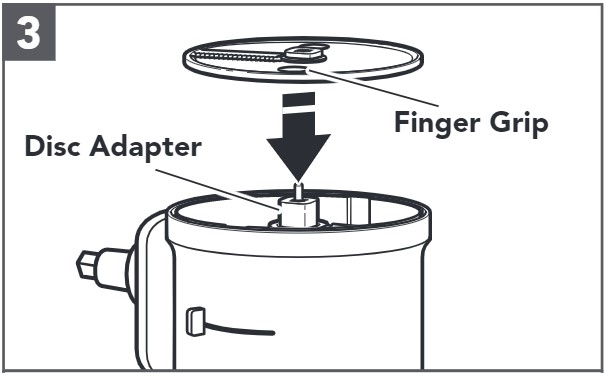
- Insert the liner into the attachment assembly so that the feed tubes line up and the liner lies flat.
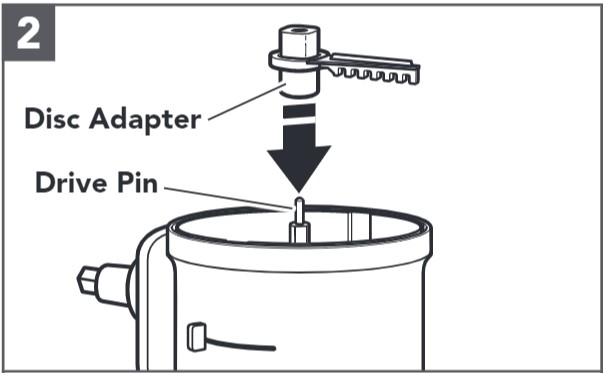
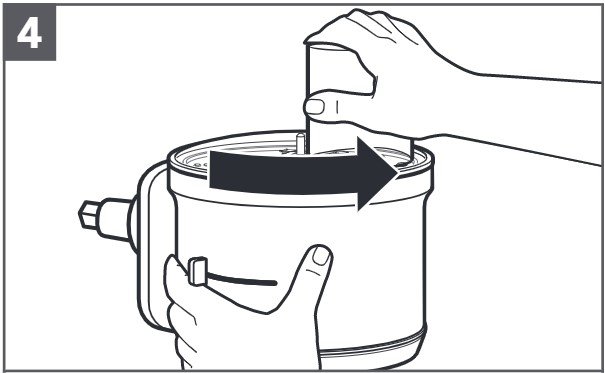
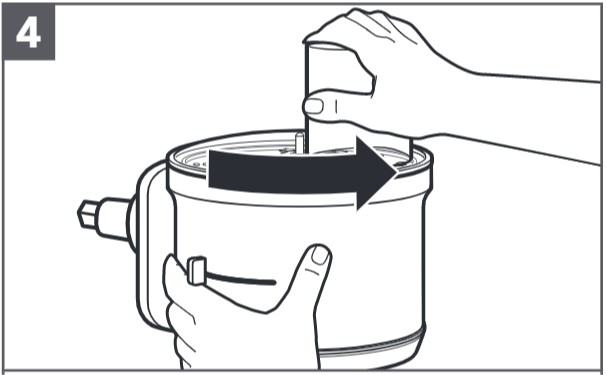
- Slide the disc adapter onto the drive pin.
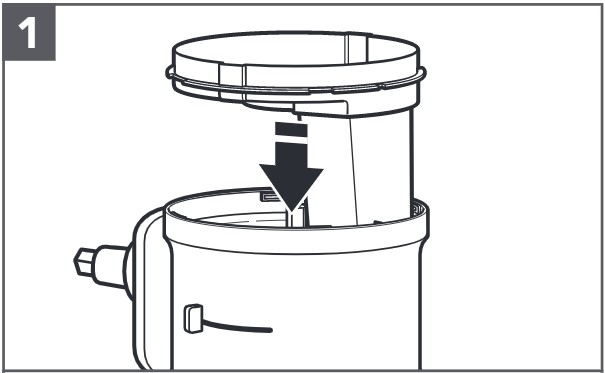
- Hold the reversible shredding disc by the two finger grips with the desired shredding side facing up. Install the disc on the disc adapter by fitting the adapter through the hole in the bottom of the disc until it is seated against the liner.
- Install the lid by turning counterclockwise, being sure it locks into place.
How to install the julienne disc:
- Insert the liner into the attachment assembly so that the feed tubes line up and the liner lies flat.
- Slide the disc adapter onto the drive pin.
- Hold the julienne disc by the two finger grips, with the smaller side of the middle hole facing up. Install the disc on the disc adapter by fitting the adapter through the hole in the bottom of the disc until it is seated against the liner.
- Install the lid by turning counterclockwise, being sure it locks into place.
How to install the adjustable slicing disc:
- Insert the liner into the attachment assembly so that the feed tubes line up and the liner lies flat.
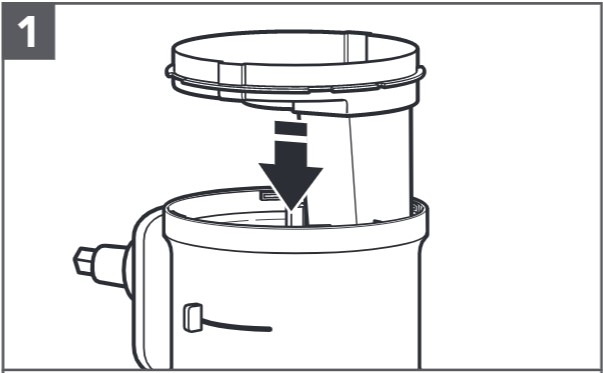
- Hold the slicing disc by the finger grips and lower it onto the drive pin. You may need to turn the disc/drive adapter until it drops down into place.
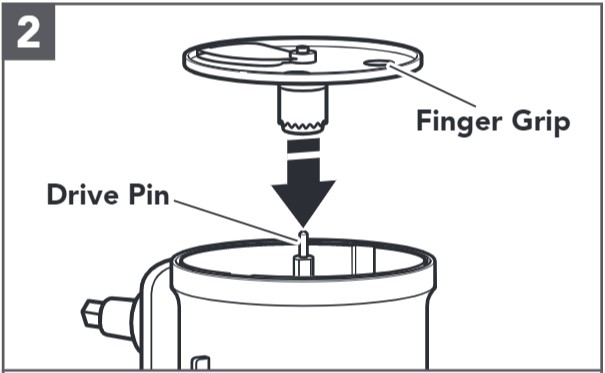
- Set the desired slicing thickness by moving the external control lever to the left for thinner slices or to the right for thicker slices.
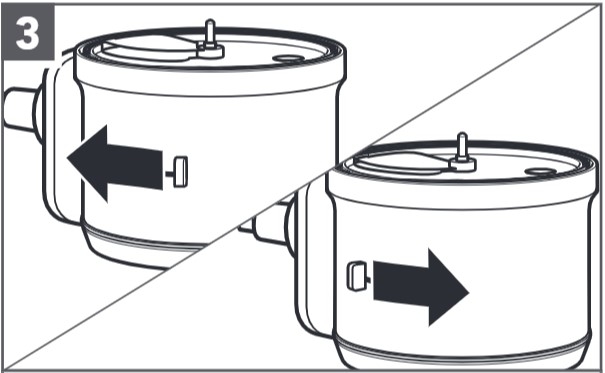
- Install the lid by turning counterclockwise, being sure it locks into place.
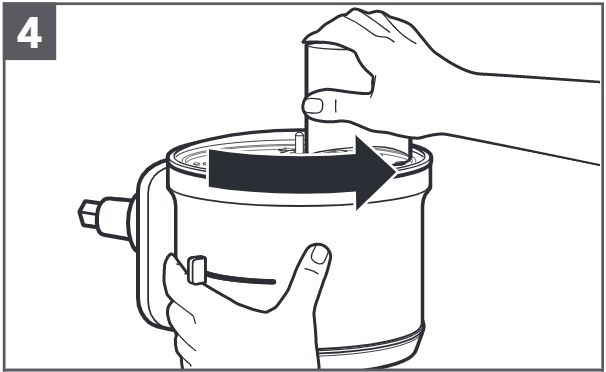 NOTE: If the sliced food is not the thickness you wanted, the external control lever can be adjusted during operation.
How to install the dicing disc and blade:
- Insert the liner into the attachment assembly so that the feed tubes line up and the liner lies flat.
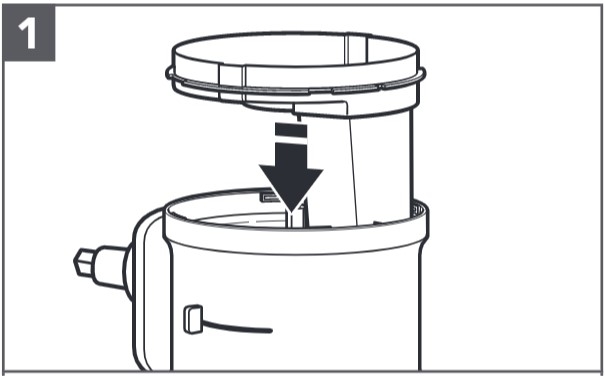
- Hold the dicing disc by the middle hole and disc edge, chute lip side facing down. Place the disc on top of the liner so that the dicing grate aligns with the liner’s feed tube.
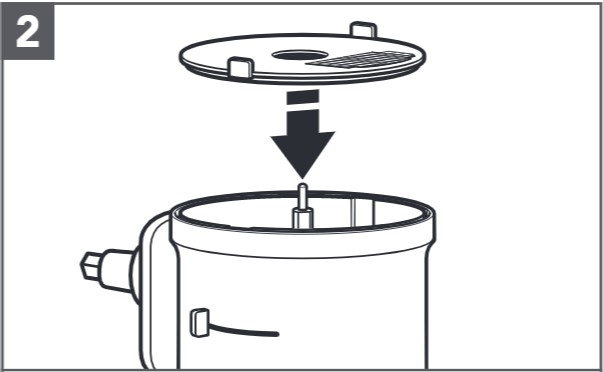
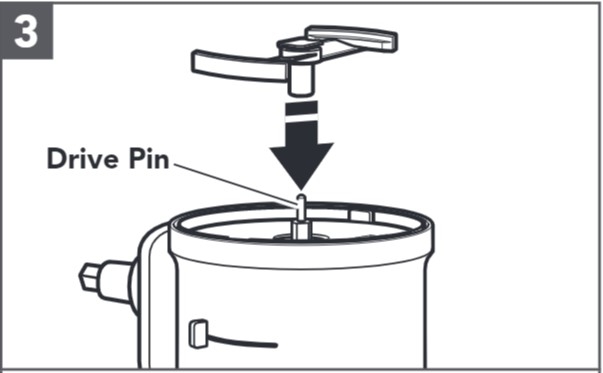
- Install the blade on top of the dicing disc by sliding it onto the drive pin.
- Install the lid by turning counter clockwise, being sure it locks into place.
