PASTA ROLLER
2 years guarantee
Pasta roller attachment for all mixers. Evenly roll dough for lasagne, linguine and more.
£ 35.70
Incl. VAT
Pay now your order in different installments with Klarna

Free standard delivery on orders above £ 75
14 days free return
100% secure payment
Roll your way to pasta perfection
Bring a taste of Italy to your kitchen with our pasta roller. It fits to your KitchenAid mixer to make pasta rolling a piece of cake. Get beautifully even sheets of dough to make your favourite pasta dishes at home.
Made for all KitchenAid stand mixers
Made of stainless steel
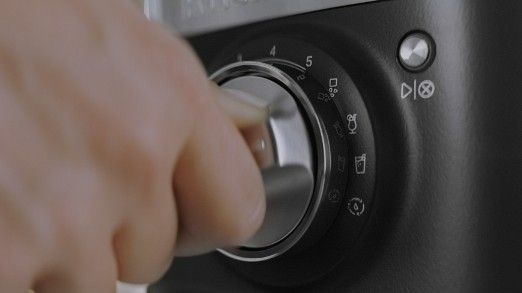
Pasta roller with 8 thickness settings
What's in the box?
The KitchenAid pasta roller 5KSMPSA is an essential accessory for all pasta lovers. Simply fit it to your KitchenAid stand mixer and let it do all the hard work.
Deliciously easy to roll pasta
Fresh, homemade pasta is a deliciously simple and rewarding way to elevate your Italian dishes. With just four simple ingredients and our KitchenAid pasta roller, you’ll be rolling out professional style pasta in no time! For a pop of colour, try experimenting with natural dyes like carrot, pepper or beetroot.
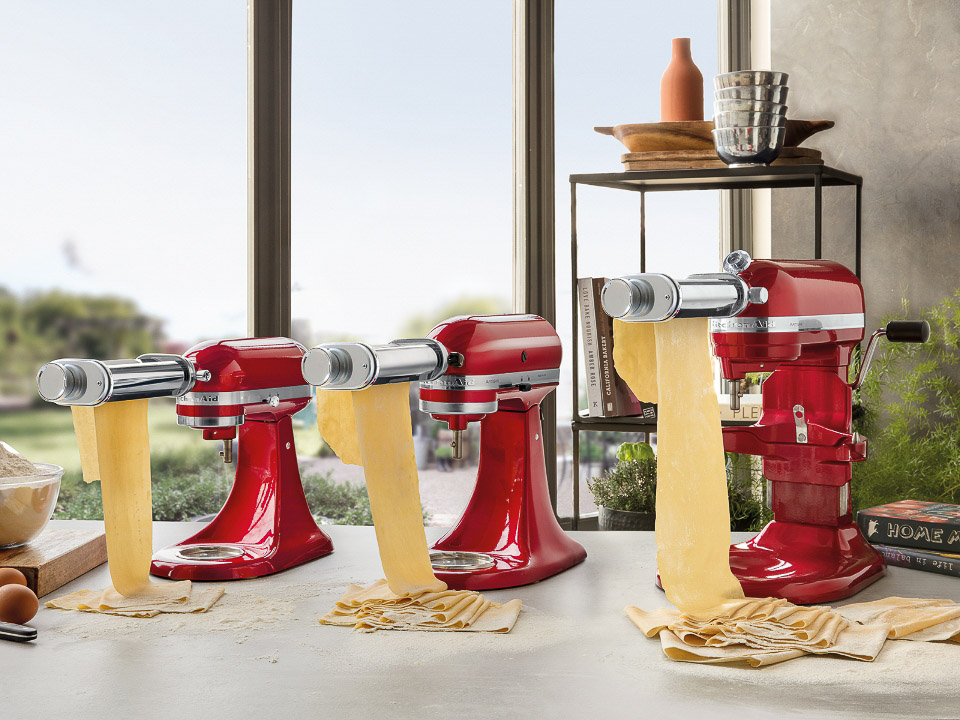
Flawlessly fits all KitchenAid stand mixers
The KitchenAid pasta roller transforms any of our stand mixers into a pasta making machine – no need for another appliance in your kitchen. Designed exclusively to work with all KitchenAid stand mixer models, this stainless steel pasta sheet roller fixes securely to your stand mixer, creating a sturdy hub that guarantees beautifully thin pasta every time — all ready to cut with our KitchenAid pasta cutters (sold separately) or your own pasta tools.
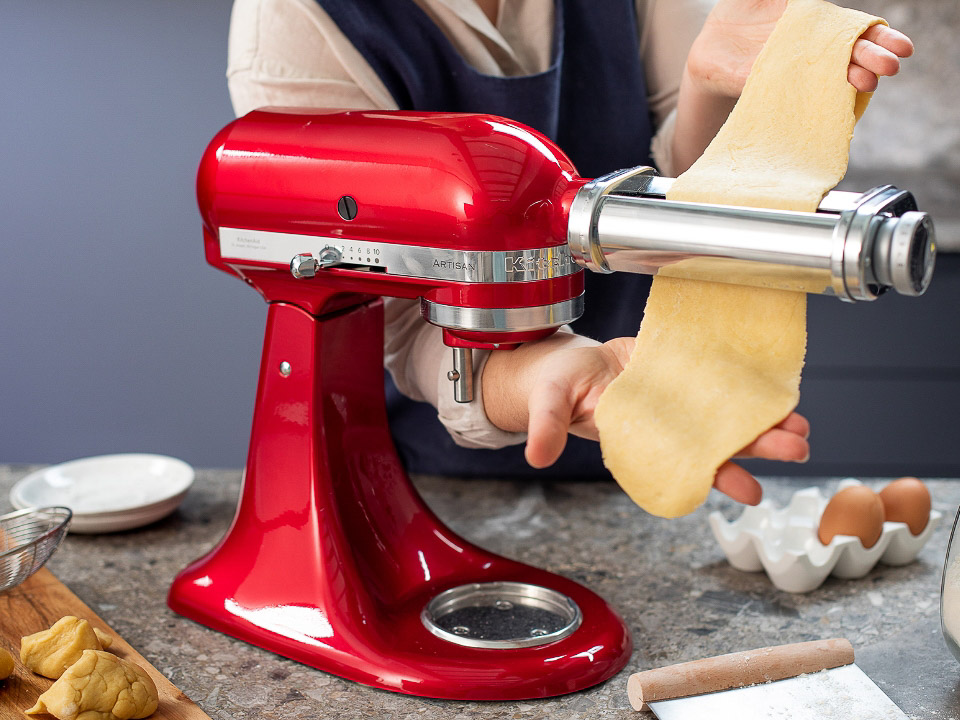
Say arrivederci to aching arms
Designed for ease and control, the KitchenAid pasta sheet roller takes the aching arms out of homemade pasta. Once you’ve made your dough and left it to rest, you can feed it through the pasta roller until it’s just right.
Divide your fresh dough into pieces and flatten, then sprinkle a little flour on the dough. Whether you’re making thick tagliolini or delicate linguine, our eight thickness settings will guarantee beautifully thin sheets of pasta every time.

Made in Italy from high quality stainless steel
Treat yourself to a pasta roller that is built to last. Made in Italy from high quality stainless steel, it’s durable and precise, rolling sheet after sheet to the thickness you need.
We’ve made sure it’s easy to clean too. The included handy little cleaning brush, gets in all the hard-to-reach parts to get rid of any dried dough. Then just wipe with a dry cloth, all ready for next time.
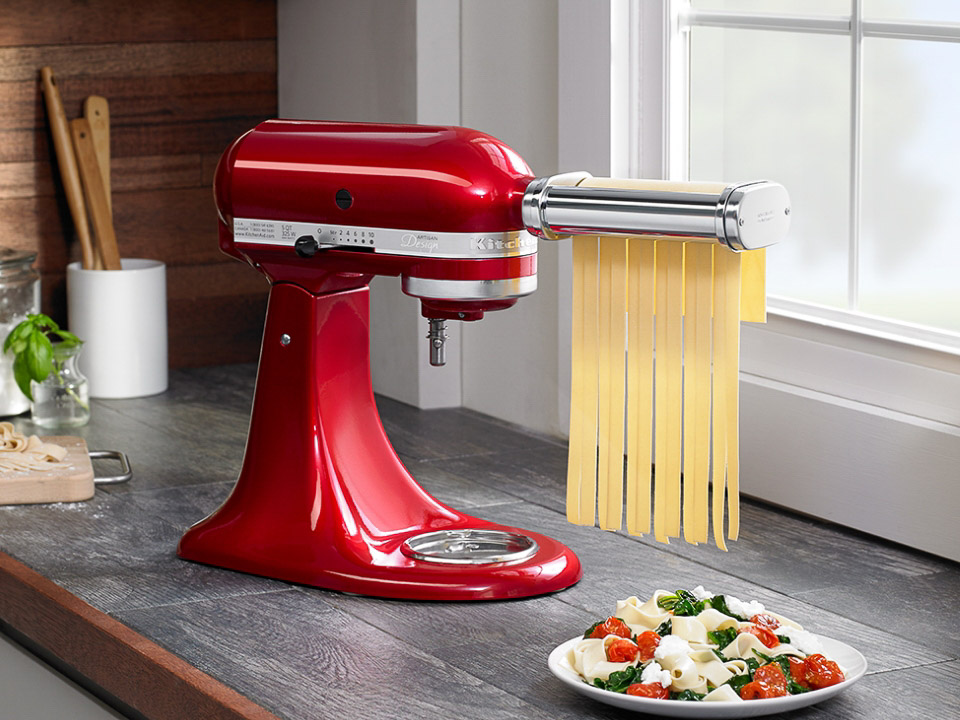
Move on to KitchenAid pasta cutters
Once you have your thin, even sheets, you can move on to cutting. You can either use manual pasta cutting tools, or our pasta cutters for making spaghetti, fettuccine or other noodles from thick to fine (sold separately). Just fit your chosen cutter to your KitchenAid stand mixer for gorgeously sleek pasta strands.
The pasta roller is a must buy.This gadget is so much easier to use than the handle models. It frees up your hands to hold the pasta through the length. I have learnt to cut the length in half , half way through to achieve that really thin pasta. To clean, I followed the instructions. Let it dry out. Use the brush to clean the rollers turning up and down the grades. Works every time. Excellent product.